Introduction
In the realm of web hosting, Virtual Private Servers (VPS) stand as a powerful solution, offering a balance of performance, control, and scalability. GoDaddy, a prominent player in the hosting industry, provides VPS hosting services tailored to meet the diverse needs of website owners, developers, and businesses. In this comprehensive guide, we’ll embark on a step-by-step exploration of GoDaddy’s VPS servers. From understanding the features to setting up and optimizing performance, this guide aims to empower bloggers, entrepreneurs, and anyone seeking robust hosting with the insights needed to harness the full potential of GoDaddy’s VPS infrastructure.
Step 1: Grasping the Fundamentals of GoDaddy VPS
a. Introduction to GoDaddy VPS Hosting
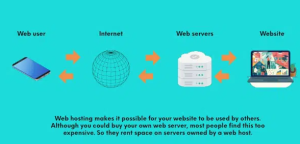
Begin by understanding the basics of GoDaddy VPS hosting. A VPS provides a dedicated portion of a physical server with resources exclusively allocated to your website or application. GoDaddy’s VPS hosting combines the benefits of shared hosting and dedicated servers, offering increased performance and control.
b. Key Features of GoDaddy VPS Servers
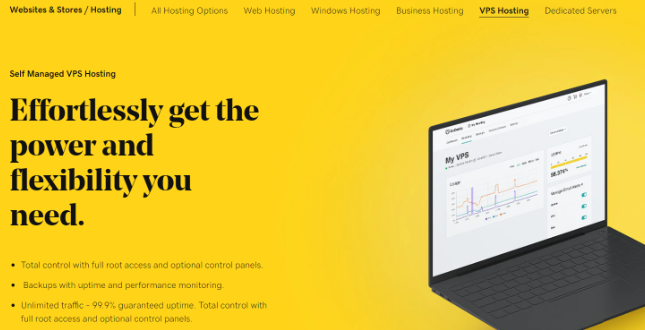
Explore the key features of GoDaddy’s VPS servers. These may include dedicated RAM, CPU cores, SSD storage, and full root access. Understanding these features is essential for making informed decisions during the setup and management process.
c. Use Cases for GoDaddy VPS
Consider the various use cases for GoDaddy VPS hosting. Whether you’re running a resource-intensive website, hosting multiple websites, or developing applications, GoDaddy’s VPS servers cater to a wide range of scenarios. Identify your specific use case to tailor the setup accordingly.
Step 2: Choosing the Right VPS Plan
a. Assessing Resource Requirements
Evaluate your resource requirements. Consider factors such as the amount of RAM, CPU cores, and storage needed for your website or applications. GoDaddy offers different VPS plans with varying resource allocations, allowing you to choose a plan that aligns with your needs.
b. Selecting an Operating System
Choose the appropriate operating system for your VPS. GoDaddy supports various operating systems, including popular Linux distributions and Windows Server editions. Select the OS that is compatible with your applications and aligns with your familiarity and preferences.
c. Managed vs. Unmanaged VPS
Decide between managed and unmanaged VPS. GoDaddy provides both managed and unmanaged options. With a managed VPS, GoDaddy assists with server management tasks, while an unmanaged VPS offers more control but requires greater responsibility for configuration and maintenance.
Step 3: Purchasing and Accessing Your GoDaddy VPS
a. Account Creation or Login
Create a GoDaddy account if you don’t have one, or log in if you’re an existing user. Your GoDaddy account is the central hub for managing all your services, including VPS hosting. Navigate to the VPS hosting section to initiate the purchase process.
b. Selecting a VPS Plan and Configuration
Choose a VPS plan that suits your needs. Select the desired resource allocation, operating system, and any additional features such as SSL certificates or domain registration. Review the pricing details to ensure it aligns with your budget.
c. Completing the Purchase Process
Complete the purchase process by providing necessary details, including payment information. Ensure accuracy in your contact details as GoDaddy will use this information for account-related communication. Confirm the order and await the provisioning of your VPS.
Step 4: Setting Up Your GoDaddy VPS
a. Receiving Server Information
Once your VPS is provisioned, you’ll receive server information via email. This typically includes the IP address, username, and password for accessing your VPS. Keep this information secure, as it is essential for server access.
b. Accessing the VPS Control Panel
Log in to the GoDaddy control panel and access the VPS control panel. Here, you can manage your server settings, view resource usage, and initiate tasks such as rebooting or scaling your VPS. Familiarize yourself with the layout and navigation of the control panel.
c. Connecting to Your VPS
Establish a connection to your VPS. Depending on the operating system, you can use SSH for Linux servers or Remote Desktop for Windows servers. Use the provided credentials to connect to your VPS and access the command-line interface or graphical interface.
Step 5: Configuring and Customizing Your VPS
a. Installing Applications and Software
Customize your VPS environment by installing necessary applications and software. Depending on your needs, this may include web servers (e.g., Apache or Nginx), databases, content management systems (e.g., WordPress), or development frameworks. Use the command line or server management tools for installation.
b. Security Configurations
Prioritize security configurations. Secure your VPS by configuring firewalls, enabling automatic updates, and implementing best practices for user permissions. GoDaddy provides security features, but additional customization enhances your VPS’s resilience against potential threats.
c. Optimizing Performance Settings
Fine-tune performance settings. Adjust server settings, such as PHP configurations, to optimize the performance of your applications. Monitor resource usage within the control panel and make adjustments based on your VPS’s performance needs.
Step 6: Monitoring and Scaling Resources
a. Monitoring Resource Usage
Regularly monitor resource usage on your VPS. Utilize the monitoring tools provided by GoDaddy to track CPU, RAM, and storage usage. Proactively identify performance bottlenecks to optimize resource allocation and maintain peak performance.
b. Scaling Resources as Needed
Scale resources based on demand. One of the advantages of GoDaddy’s VPS hosting is the ability to scale resources up or down as your website or application grows. Adjust CPU, RAM, or storage allocations to accommodate fluctuations in resource requirements.
c. Automatic Scaling Options
Explore automatic scaling options. Depending on your VPS plan, GoDaddy may offer automatic scaling features that adjust resources based on traffic patterns. Familiarize yourself with these options to ensure your VPS scales seamlessly.
Step 7: Backing Up and Securing Your VPS Data
a. Automated Backups
Enable automated backups. Protect your data by configuring automated backups through GoDaddy’s platform. Regular backups ensure that you can quickly recover your VPS in the event of data loss or system failures.
b. Data Encryption and SSL Certificates
Implement data encryption. If your VPS handles sensitive information, configure SSL certificates to enable secure, encrypted connections. GoDaddy offers SSL options that enhance the security of data transmitted between your VPS and users.
c. Regular Security Audits
Conduct regular security audits. Periodically review and update security configurations, perform vulnerability assessments, and stay informed about security best practices. Proactive security measures are essential for safeguarding your VPS.
Step 8: Utilizing GoDaddy Support and Resources
a. Accessing Customer Support
Familiarize yourself with GoDaddy’s customer support channels. In case of issues or questions, reach out to GoDaddy’s support team through live chat, phone, or email. Utilize the extensive knowledge base and documentation available on the GoDaddy website.
b. Community Forums and Discussions
Engage with the GoDaddy community. Participate in forums and discussions to connect with other users, share experiences, and seek advice. The community can be a valuable resource for troubleshooting, tips, and insights into optimizing your VPS.
c. Staying Informed About Updates
Stay informed about platform updates. GoDaddy regularly releases updates and improvements to its VPS hosting services. Monitor announcements and update your VPS as needed to benefit from the latest features and security enhancements.
Step 9: Managing Domain and DNS Settings
a. Domain Registration and Management
Manage your domain settings. If you registered your domain with GoDaddy, use the control panel to configure domain settings. This includes updating DNS records, setting up subdomains, and managing domain-related features.
b. Utilizing Domain Forwarding and Aliases
Implement domain forwarding and aliases. GoDaddy allows you to set up domain forwarding to redirect traffic to another URL. Additionally, configure domain aliases for multiple domain names to point to the same website or application.
c. DNS Security Configurations
Enhance DNS security configurations. Implement DNS security features provided by GoDaddy, such as DNSSEC (Domain Name System Security Extensions), to protect against DNS-based attacks and ensure the integrity of your domain.
Step 10: Reviewing Billing and Renewal Processes
a. Billing and Invoicing
Review billing and invoicing processes. Familiarize yourself with GoDaddy’s billing cycles, payment methods, and renewal procedures. Ensure that your payment information is up-to-date to avoid service interruptions.
b. Auto-Renewal Settings
Configure auto-renewal settings. Enable auto-renewal for your VPS to ensure continuity of service. GoDaddy often provides options to set up automatic renewal, preventing accidental disruptions due to expired services.
c. Monitoring Resource Costs
Monitor resource costs. Keep an eye on resource usage and associated costs to optimize your VPS’s performance and budget. Adjust resource allocations based on usage patterns and consider cost-effective alternatives if needed.
Step 11: Planning for Future Growth
a. Scalability Planning
Plan for future scalability. Anticipate the growth of your website or application and align your scalability plans with evolving needs. GoDaddy’s VPS hosting offers the flexibility to scale vertically or horizontally as your requirements change.
b. Regular Performance Reviews
Conduct regular performance reviews. Periodically assess your VPS’s performance, security, and cost-effectiveness. Identify areas for improvement, implement optimizations, and stay proactive in managing your VPS for optimal results.
c. Exploring Additional GoDaddy Services
Explore additional GoDaddy services. Depending on your evolving needs, consider leveraging other services offered by GoDaddy, such as managed WordPress hosting, domain privacy, or email hosting. Integrating these services can enhance your overall online presence.
Conclusion
Navigating the landscape of GoDaddy VPS hosting demands a strategic and step-by-step approach. By comprehending the features, setting up and customizing your VPS, optimizing performance, and utilizing support resources, you can unlock the full potential of GoDaddy’s VPS infrastructure. May this comprehensive guide be your trusted companion as you embark on the journey of hosting your